
Elsewhere I have already described the advantages of the new server-side Google Tag Manager over the previous web container by providing better privacy and more control over the collected data. This post will focus on how to set up a custom server container on a Debian system using Docker.
Introduction
If one follows the recommendation of Google when implementing a server-side Google Tag Manager, this requires hosting resources like App Engine in the Google Cloud. Depending on the setup this can results in costs going up to 100 euros or more. For smaller sites these costs are not justifiable, which is why the purpose of this guide is to show an alternative way to install the server-side Google Tag Manager on your own server without additional costs. An excellent tutorial on how to set up the GTM in the Google Cloud can be found on Simo Ahav's blog.
Until now, it was only possible to get the image for the server-side containers running on a dedicated server via a roundabout way. Recently, there is an official documentation including the corresponding Docker image for manual installation of the server-side Google Tag Manager.
System requirements
The prerequisite is a virtual or dedicated Linux server with Debian as operating system. Docker installation will be performed during this tutorial. In Google's App Engine Instances setup, the performance requirements are listed as 1 vCPU, 0.5 GB RAM and 10 GB disk space. So obviously this is less about system performance and more about the number of instances. Google recommends running at least three instances in parallel to catch traffic peaks and server failures.
In this setup, the server-side Google Tag Manager is installed on the same web server that runs this blog. Therefore, it only serves the purpose of illustrating a possibility for a cost-effective installation. It is therefore unsuitable for high-performance and traffic-intensive websites.
Docker installation
Docker is a software environment that allows applications to be quickly and easily installed on a system by loading all the required dependencies independently. A small virtual subsystem is created, so to speak, that functions autonomously.
For installation on Debian, this guide is recommended. Only a few steps are needed. First, the appropriate dependencies and the Docker GPG key are installed:
sudo apt-get update

sudo apt-get install \
    apt-transport-https \
    ca-certificates \
    curl \
    gnupg \
    lsb-release

curl -fsSL https://download.docker.com/linux/debian/gpg | sudo gpg --dearmor -o /usr/share/keyrings/docker-archive-keyring.gpg
After this we install the following apt-packages for the Docker environment:
sudo apt-get update
sudo apt-get install docker-ce docker-ce-cli containerd.io
After a few minutes, this process is complete and the functionality of the Docker environment can be tested:
sudo docker run hello-worldIf this command completes without errors, we are ready for the next step.
Create subdomain for preview and tracking server
Before loading and running the Docker containers for the server-side Google Tag Manager, we first need to create two subdomains. The first one will be used to access the preview server, which is needed for the GTM's preview mode. The second domain will be the "official" tracking domain, to which all requests from the site will be forwarded.
Because we use the same server for both preview mode and live mode, we adjust the port for the preview server from 8080 to 8079 so that it does not overlap with the live server. We also set up a redirect to the SSL-encrypted port.
As an example for an Apache web server, this is illustrated here:
<VirtualHost *:80>
    ServerName preview.example.com

    RewriteEngine On
    RewriteCond %{HTTPS} off
    RewriteRule ^ https://%{HTTP_HOST}%{REQUEST_URI}
</VirtualHost>

<VirtualHost :443>
    ServerName preview.example.com

    ProxyPreserveHost On
    ProxyRequests Off

    ProxyPass / https://localhost:8079/
    ProxyPassReverse / https://localhost:8079/

    SSLEngine On
    SSLCertificateFile    <path to your crt file>
    SSLCertificateKeyFile   <path to your private key file>

</VirtualHost>
The same applies to the live server:
<VirtualHost *:80>
    ServerName data.example.com

    RewriteEngine On
    RewriteCond %{HTTPS} off
    RewriteRule ^ https://%{HTTP_HOST}%{REQUEST_URI}
</VirtualHost>

<VirtualHost :443>
    ServerName data.example.com

    ProxyPreserveHost On
    ProxyRequests Off

    ProxyPass / https://localhost:8080/
    ProxyPassReverse / https://localhost:8080/

    SSLEngine On
    SSLCertificateFile    <path to your crt file>
    SSLCertificateKeyFile   <path to your private key file>

</VirtualHost>
Once this configuration is complete, the services as well as the pages are still activated and the web server is restarted.
a2ensite gtm-preview
a2ensite gtm-live
sudo a2enmod proxy && sudo a2enmod proxy_http && sudo service apache2 restart
Setting up the Docker containers
Once the intended endpoints are accessible via the respective ports to https://localhost/, the Docker containers can now be set up.
The following parameters are required for this:
- -d: Run Docker container in the background ("detached").
- --name: Docker container name.
- -p: Port through which the Docker container is accessible.
- CONTAINER_CONFIG: Container ID specified when creating the server container at https://tagmanager.google.com
- RUN_AS_PREVIEW_SERVER: The first Docker container goes live as a preview server.
- PORT: The same port as above.
This results in the following commands to start the two containers. It is important to start the preview container first, as the live container points to its URL:
docker run -d\
    --name gtm-preview \
    -p 8079:8079 \
    -e CONTAINER_CONFIG='<container ID>' \
    -e RUN_AS_PREVIEW_SERVER=true \
    -e PORT=8079 \
    gcr.io/cloud-tagging-10302018/gtm-cloud-image:stable

docker run -d\
    --name gtm-live \
    -p 8080:8080 \
    -e CONTAINER_CONFIG='<container ID>' \
    -e PREVIEW_SERVER_URL='https://preview.domain.de' \
    -e PORT=8080 \
    gcr.io/cloud-tagging-10302018/gtm-cloud-image:stable
If this process was successful, docker ps -a can be used first to check whether the containers are running. To check that the two endpoints for the preview and live servers are accessible, the path /healthz with the respective domains is used.
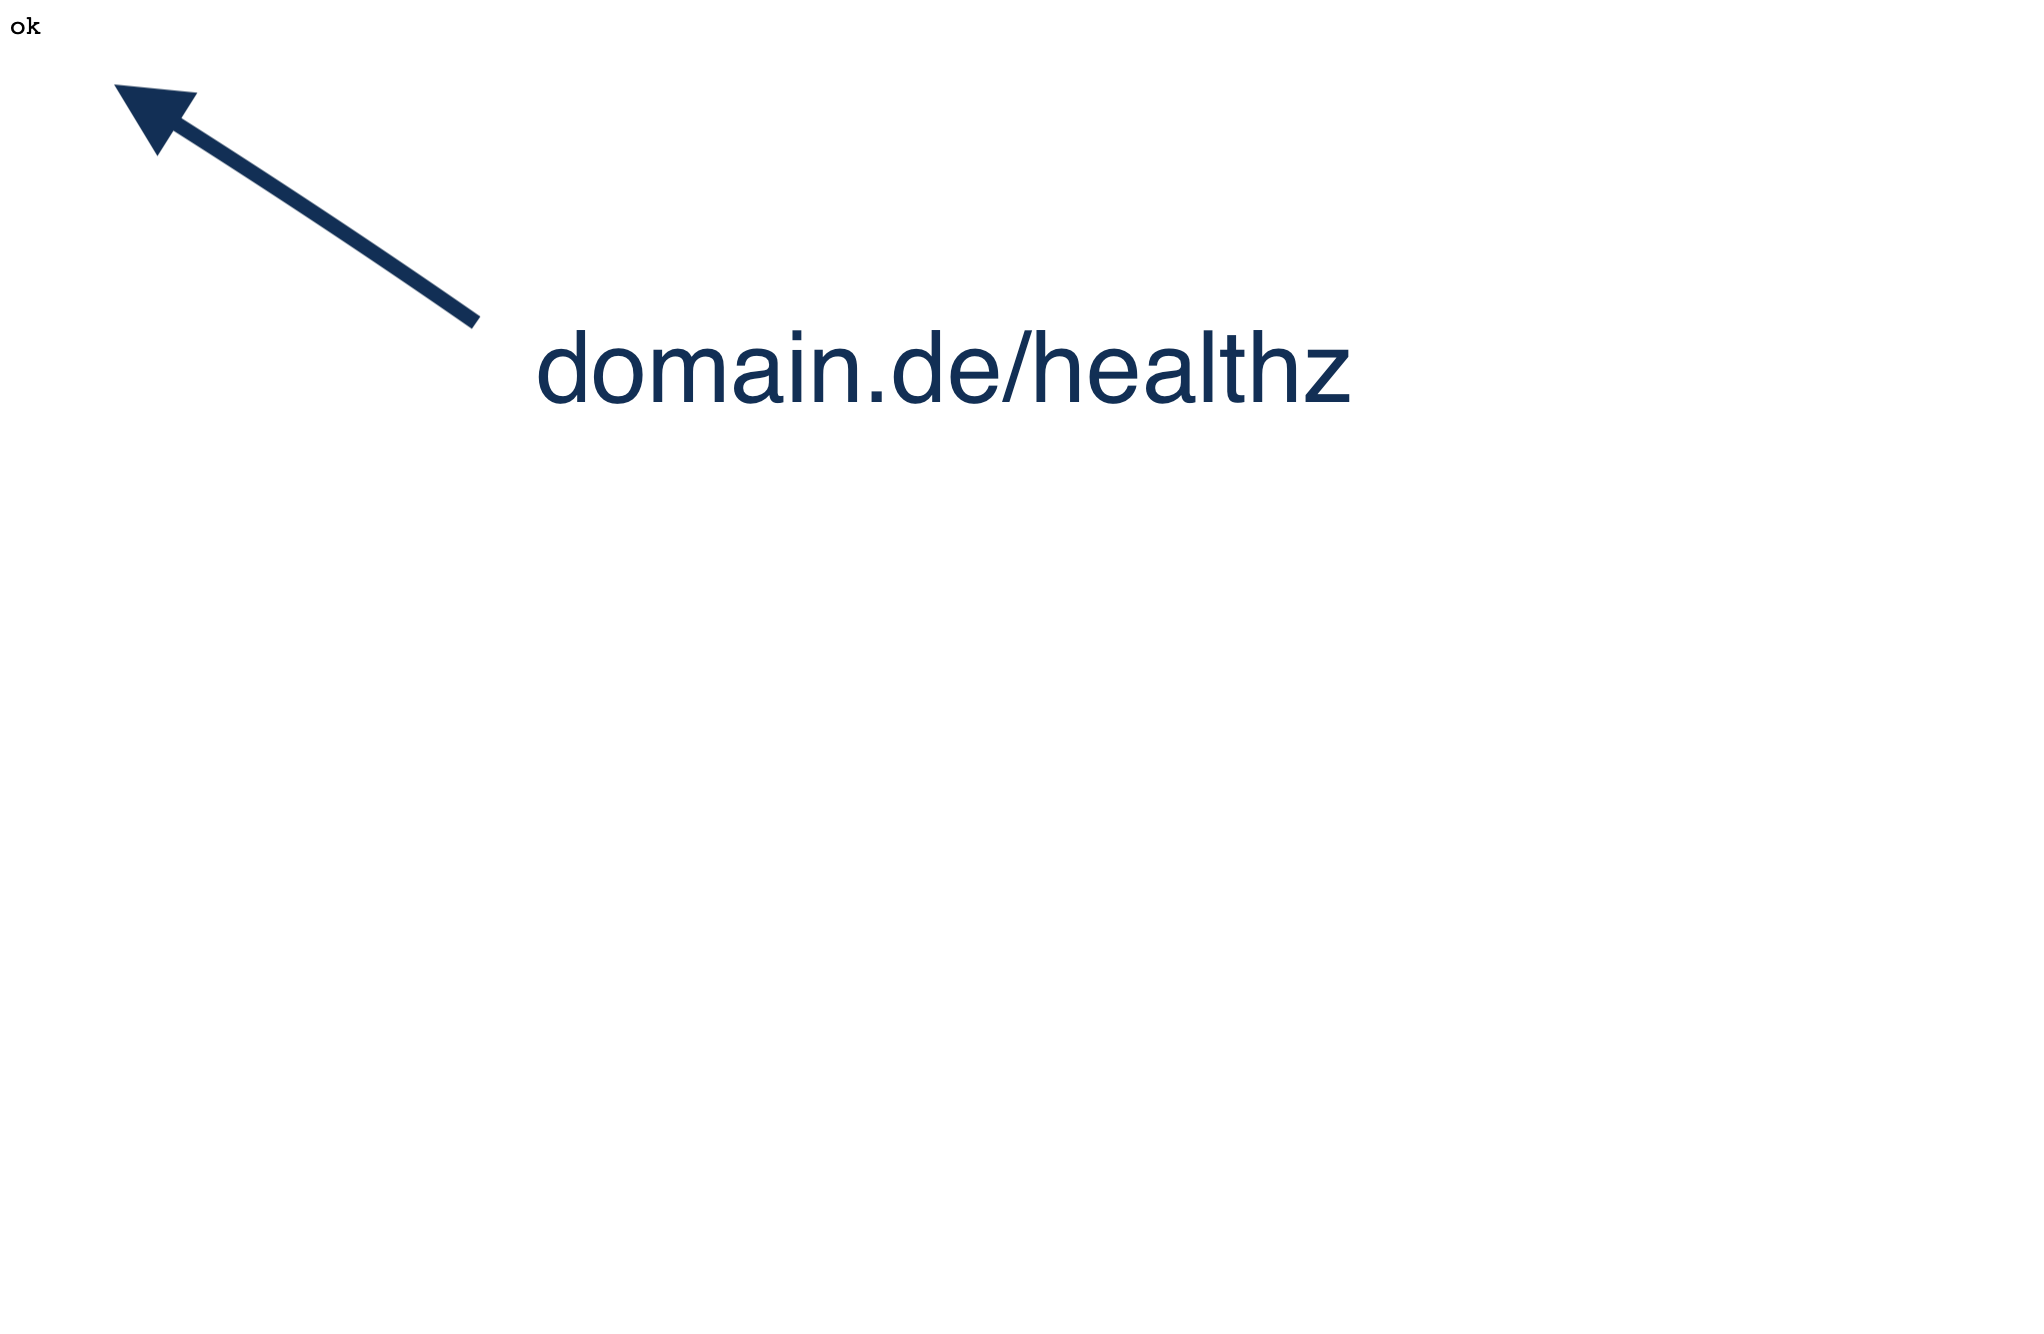
If an ok is displayed in the upper left corner of the browser, the setup of the Docker containers has worked and the custom GTM server is live!
When setting up the GTM server containers, there is an important note from Google about best practices to keep in mind:
Make sure to restart the servers periodically to ensure your servers have the latest code updates for SST. Failure to do so may result in incompatible functionality for new SST features. One way to know when the server needs to restart is to set up liveness checks, which is explained further below. Also, please note that any published updates to your server container will still be applied without a restart.
To ensure that the Docker containers are restarted regularly, we create a cron job. To do this, we navigate to the job file via the console with crontab -e and add the following line:
0 3 * * * docker restart gtm-preview gtm-liveThis means that both Docker containers are restarted daily at 3 a.m. - a time when a minimally short break should be tolerable.
Summary
With the server-side Google Tag Manager, Google has created an attractive option for taking greater control of data collection on your own website and determining the content of forwarded data. As a positive side effect, this type of data collection currently means that tracking is less likely to be blocked.
However, a setup in the Google Cloud is not worthwhile for every website. If the requests are low and the server still has capacity, then there is nothing to stop you from hosting the GTM server yourself for now. Feel free to let me know if I'm overlooking any potential objections!
To further control data collection or anonymize data submitted to Google Analytics, there are additional configurations we can make in the server-side Google Tag Manager. I look forward to presenting more approaches here in the future.